Login Window
Log in to the Utiliko website with your valid username and password.
Login URL: https://www.utiliko.io/wp-admin

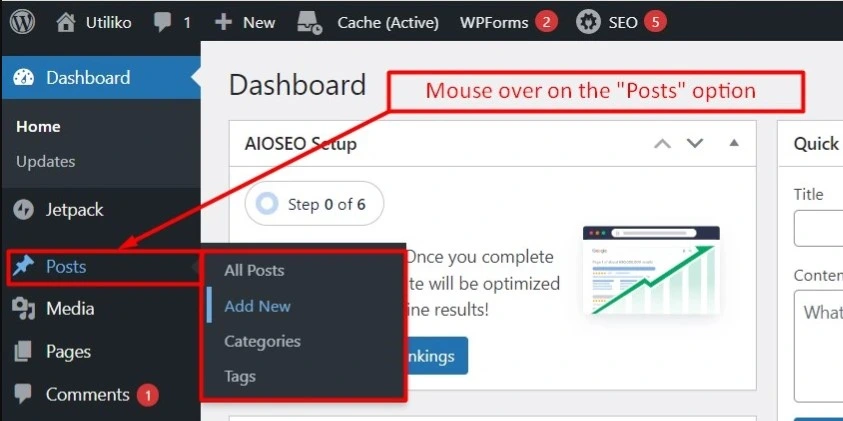
Posts Option
Post option to add a new post/blog
After successfully logging into the website dashboard, just move the mouse cursor over the “Post” option on the left-hand side of the website dashboard menu.
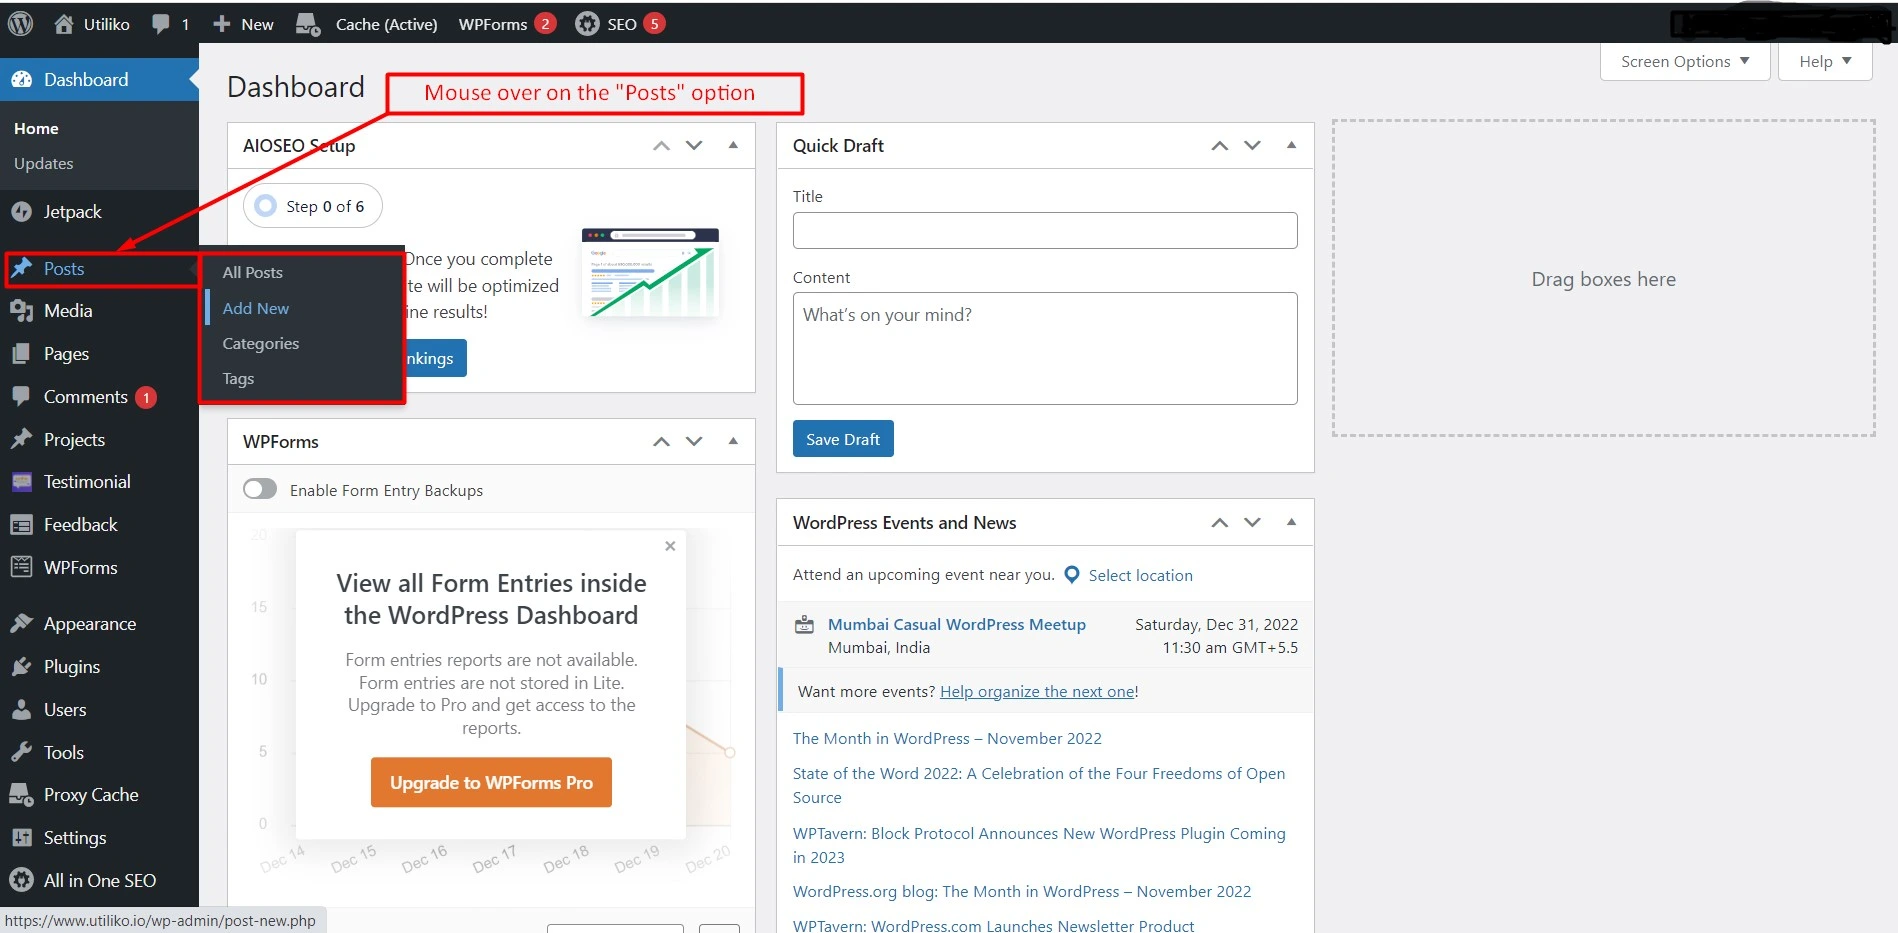
Blog Publishing Window
Click on the ”Add New” option. After clicking on the “Add New” option, the blog publishing window will open.
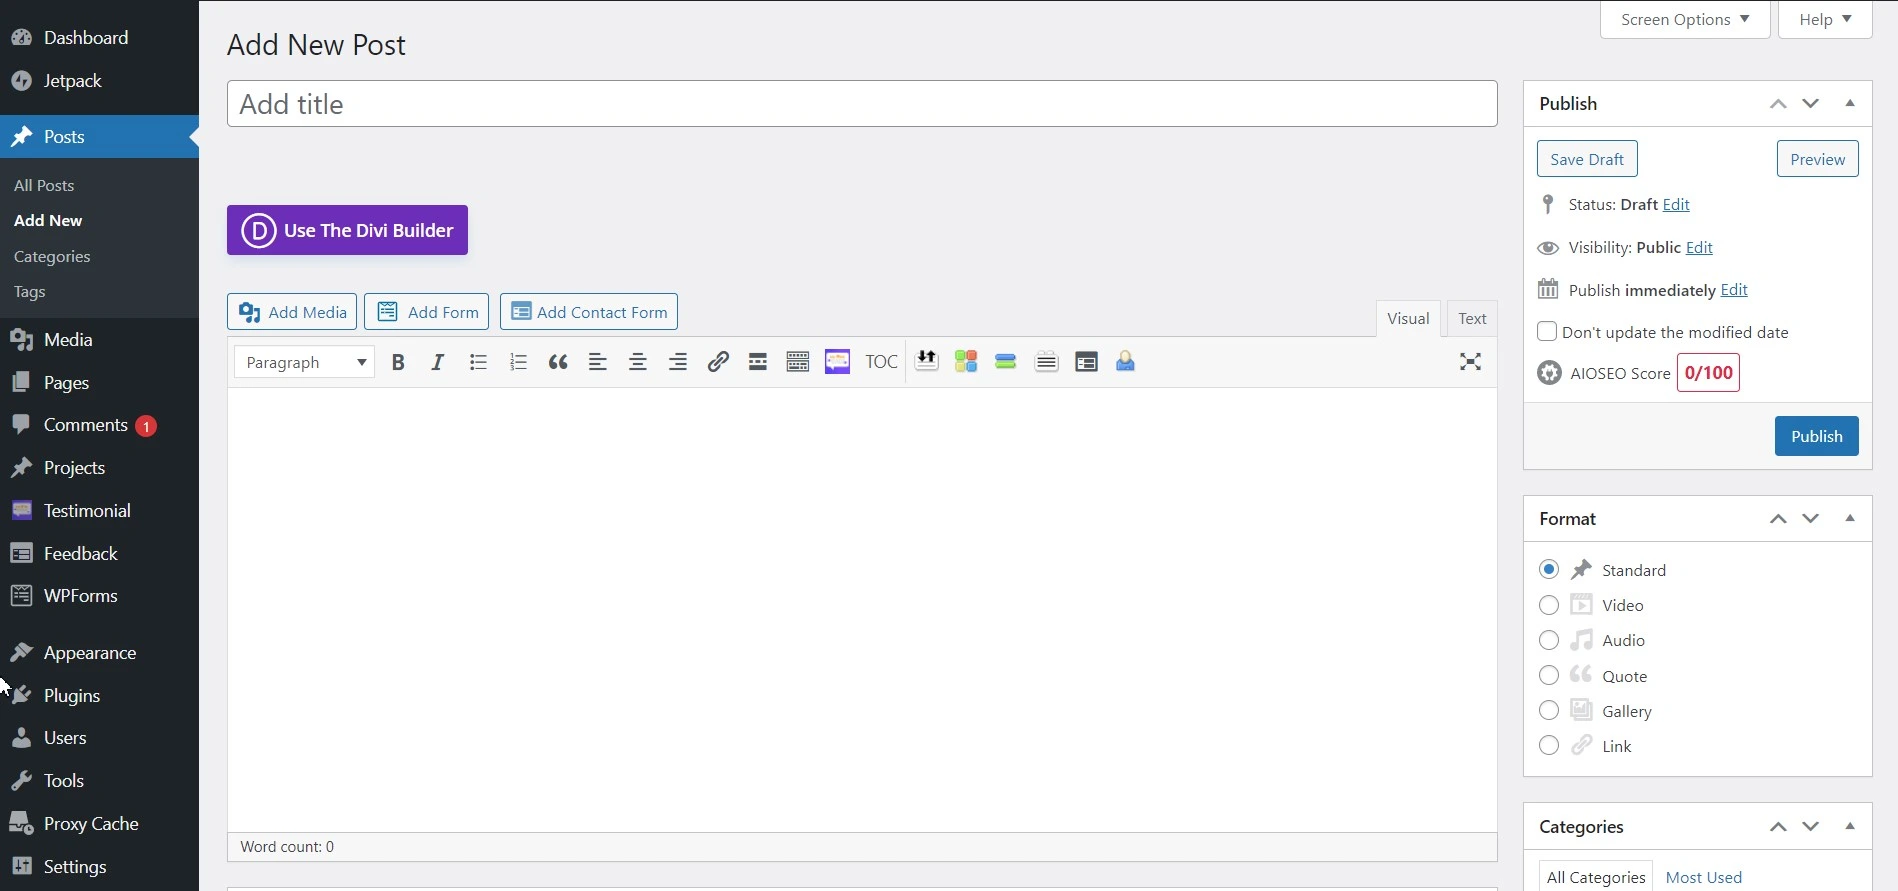
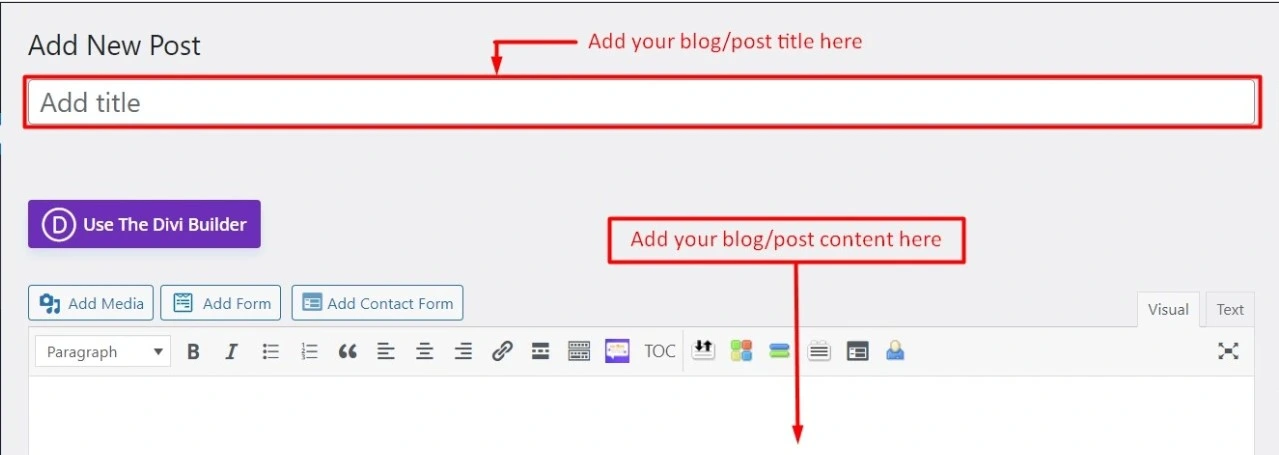
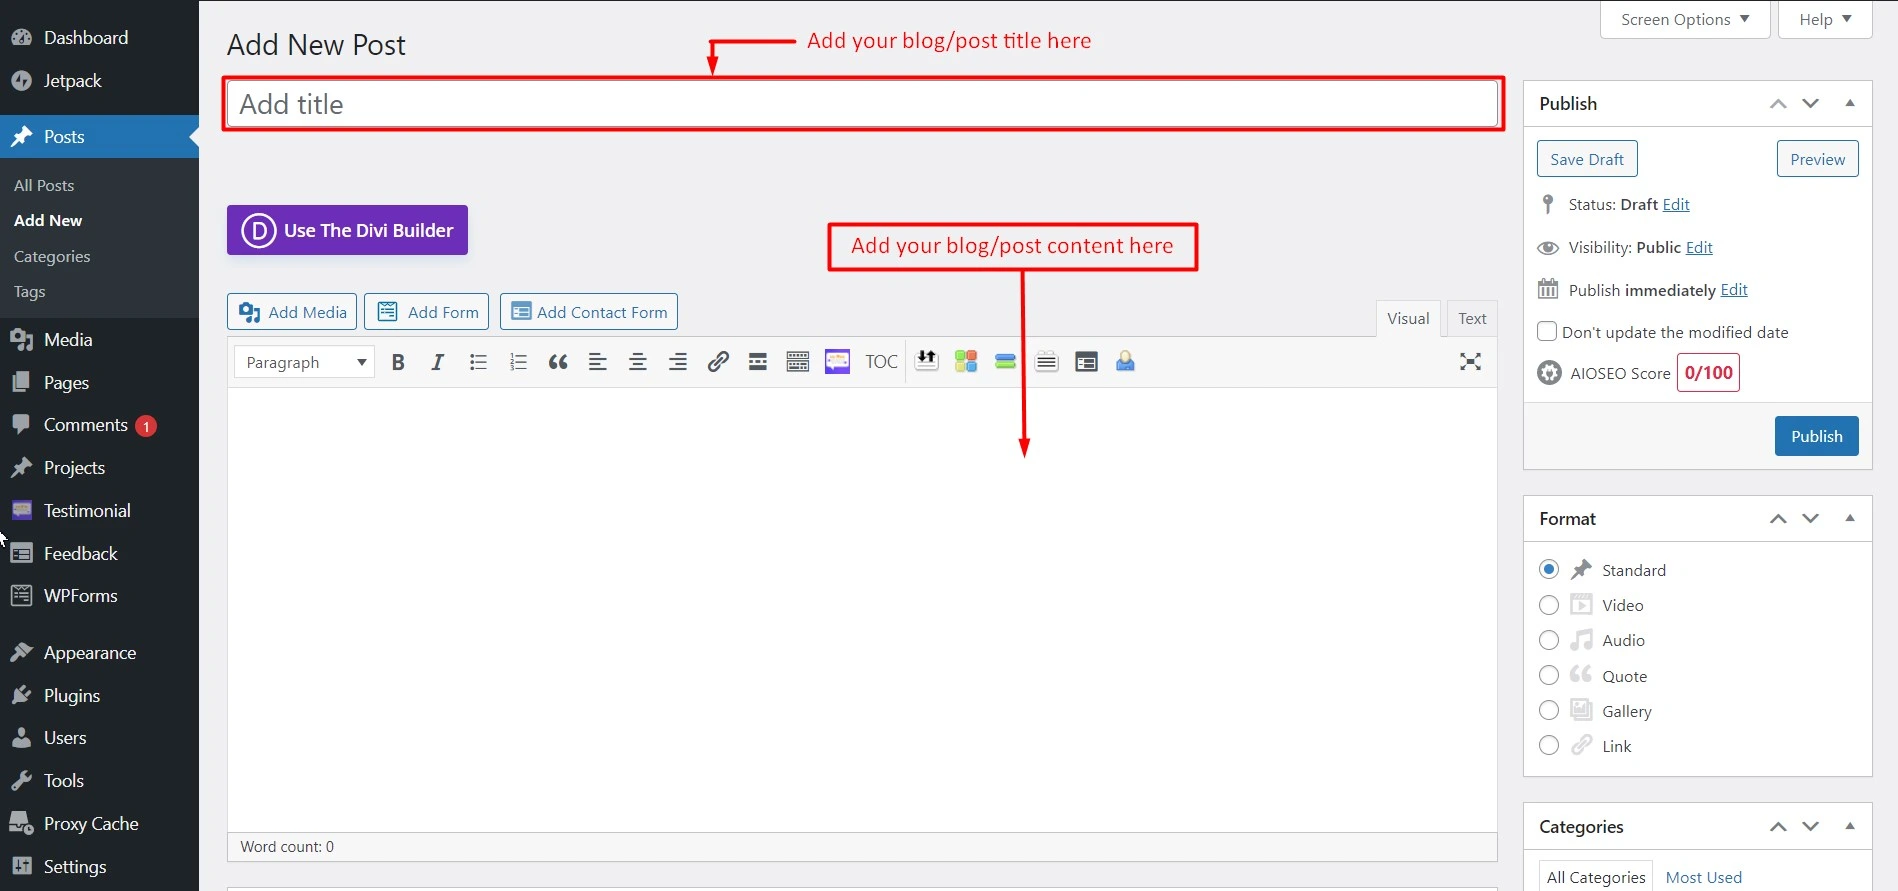
Add Title
In the blog publishing window, to add a blog or post title, you will get the “Add New Post” section. In that section, you have to add your blog title just click on “Add title”.
Add post/blog content
After adding the blog title, add your blog/post content just below the “Add New Post” section.
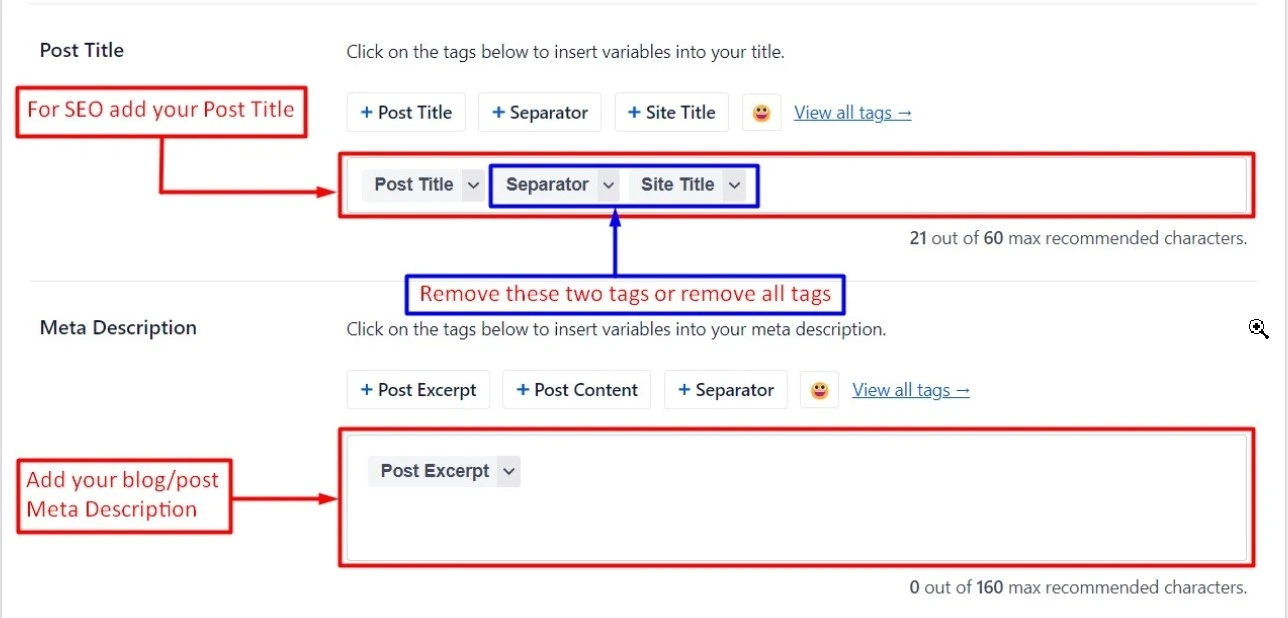
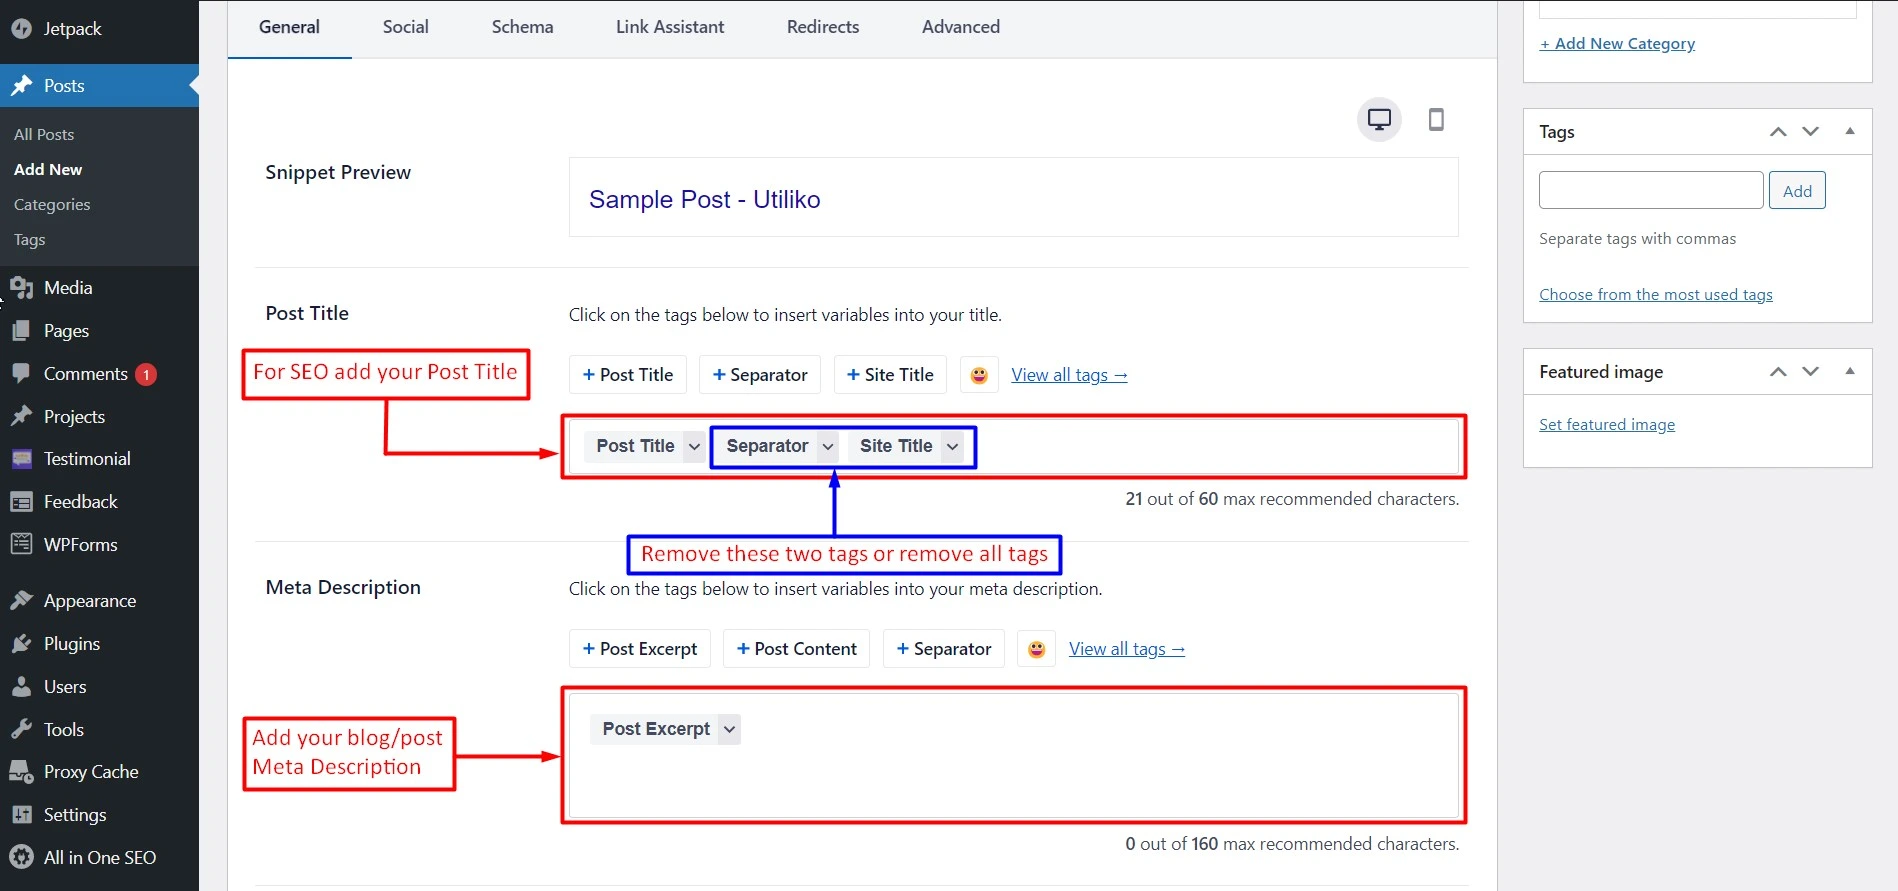
Add post title & Meta Description for SEO
After adding the blog/post title and post content just scroll down the window. After the scrolling window, you will get the Post Title option. Add your Post Title according to the SEO. After adding your Post title add your blog’s meta description.
To add a post title and meta description for SEO, you first have to remove the tags present in the placeholder.
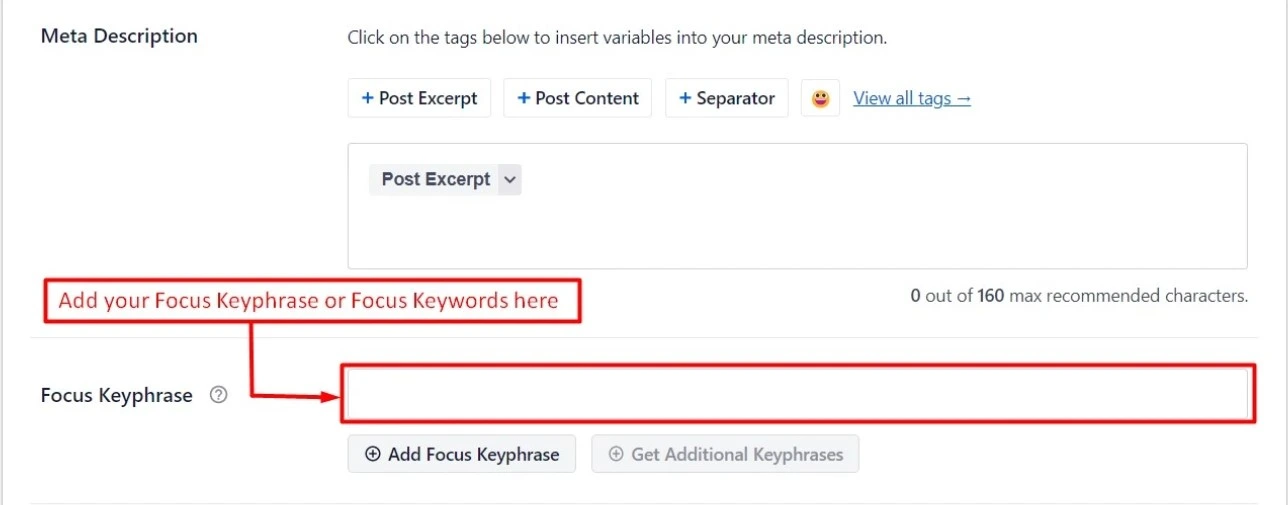
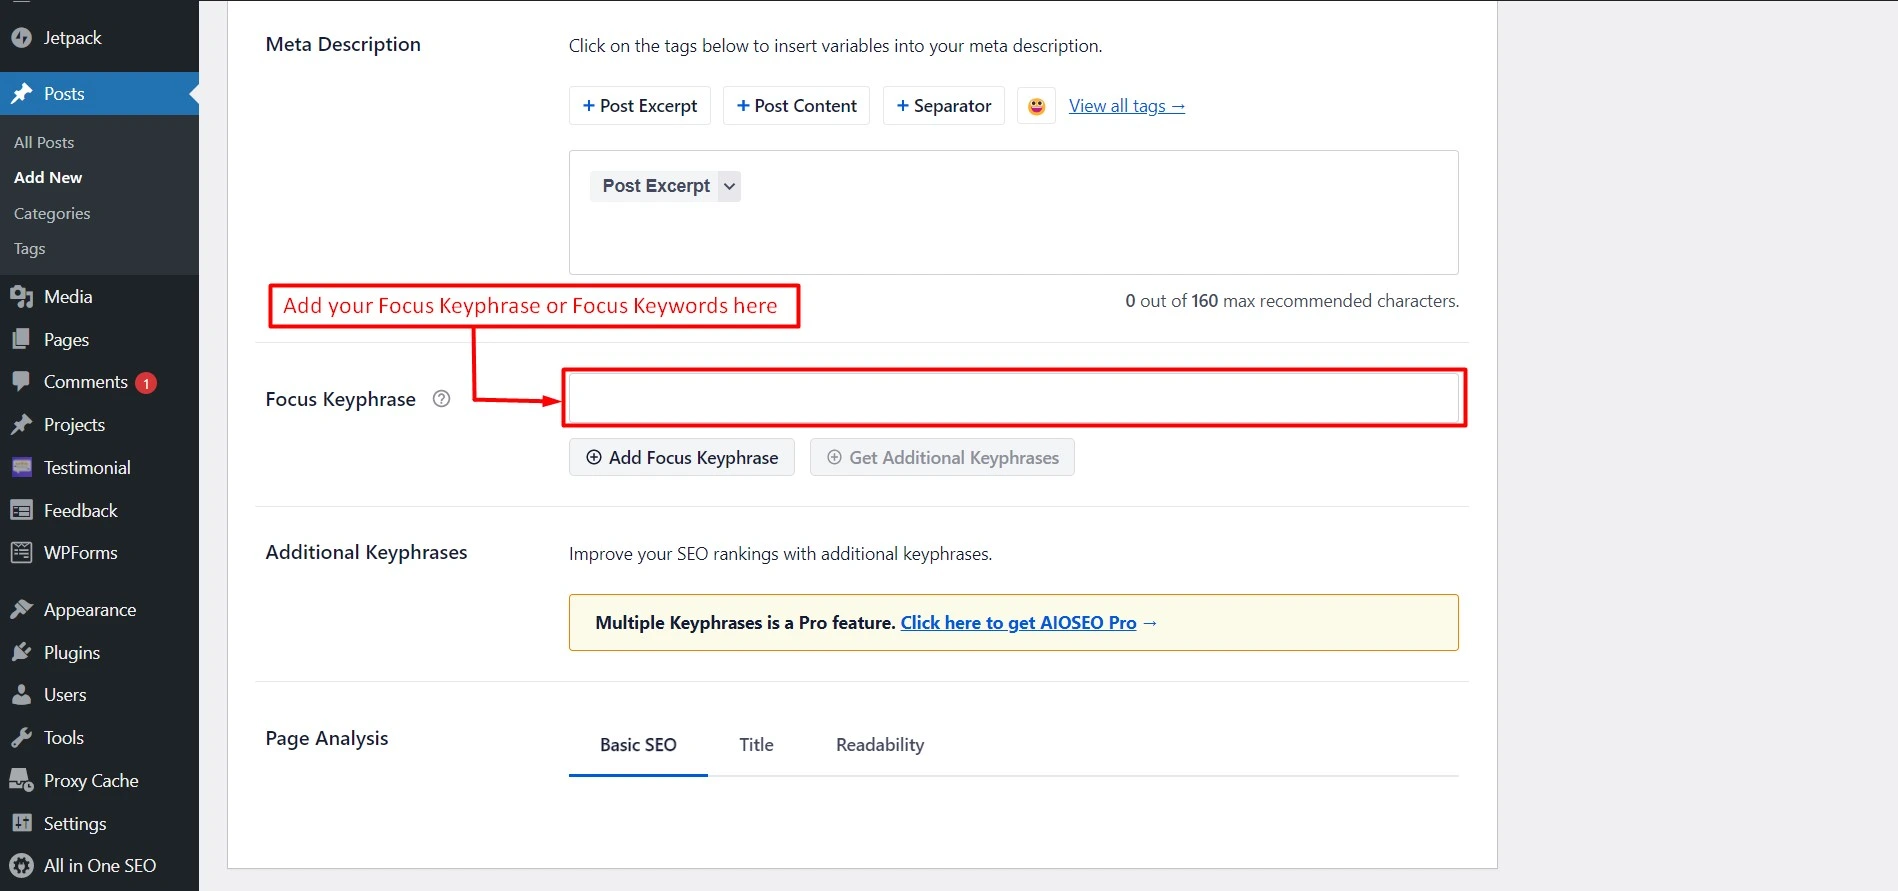
Add Focus Keyphrase or Focus Keyword for SEO
After adding the post title and meta description you have to add the focus keyphrase or focus keywords of the blog. To add the focus keyphrase or focus keywords you have to just scroll down the window and just beneath the Meta Description, you will get the Focus Keyphrase section. Put your blog’s focus keyphrase or focus keywords in the input box.
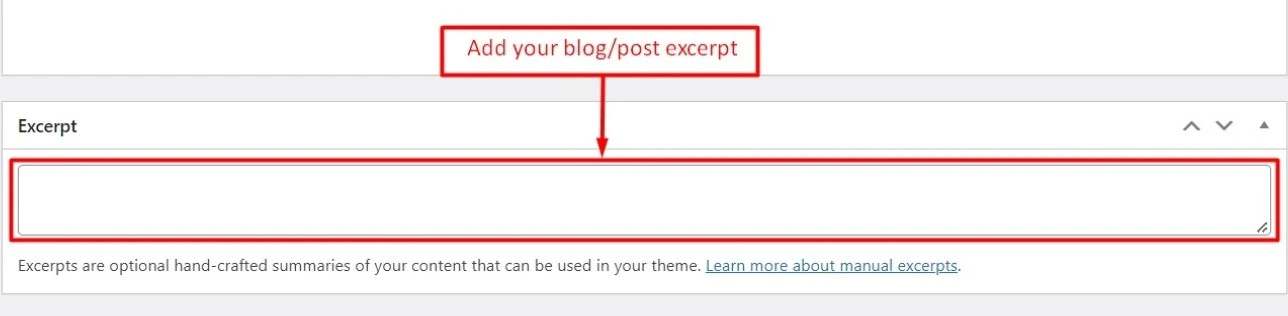
Add Excerpt
After adding the focus keyphrase or focus keyword of the blog you have to scroll down the window and you will get the Excerpt section for your blog. Add your blog excerpt into the input box.

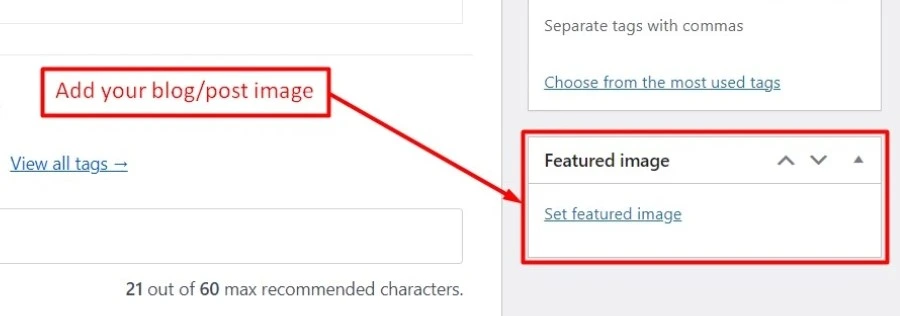
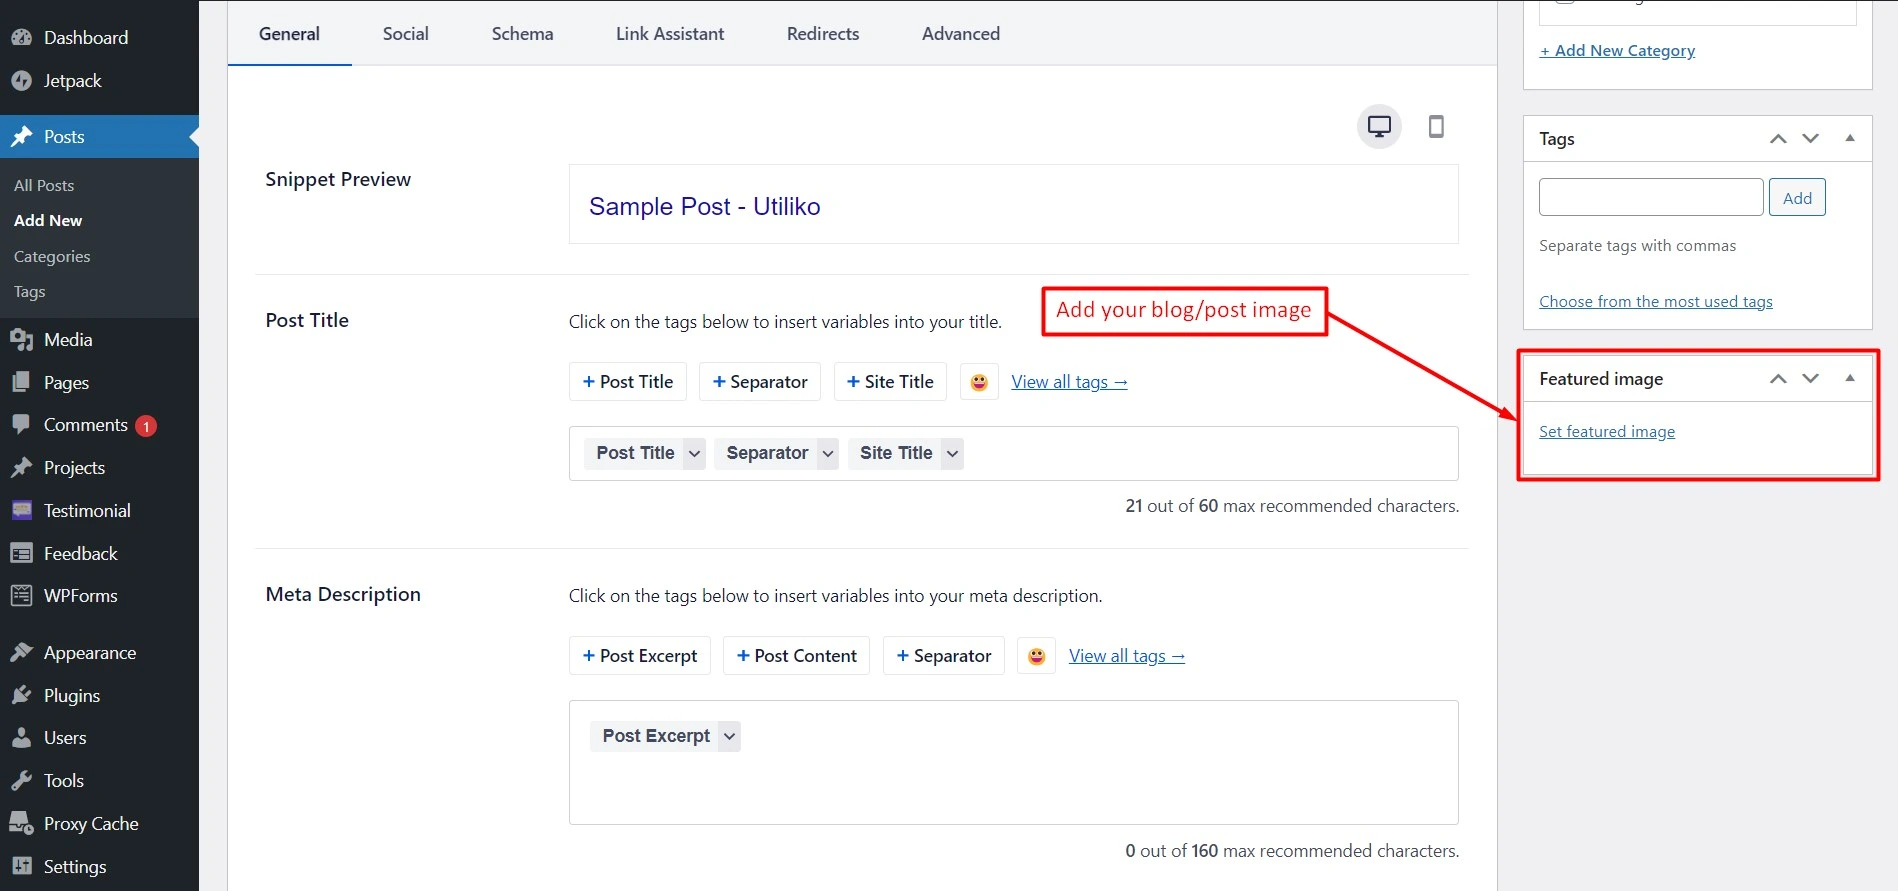
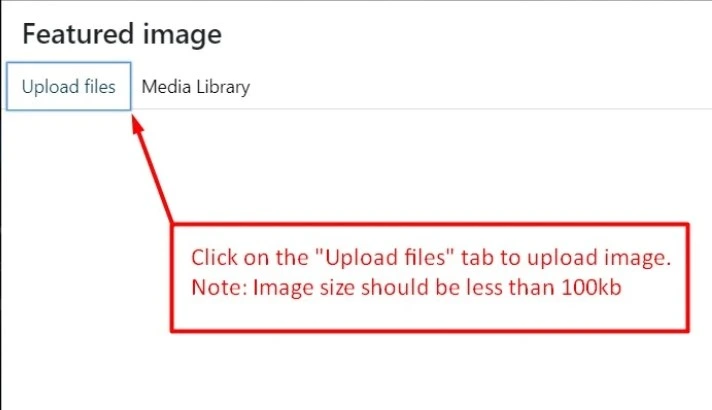
Add Featured/Banner image
After adding the blog/post excerpt, Scroll up the page and you will see the right sidebar. In the right sidebar, you will get the Featured Image section at the bottom of the sidebar. Click on the “Set featured image” option and add your blog’s banner or featured image.
Steps to add featured/banner image for the blog:
- Click on the “Set featured image”.
- Upload your blog image from the media library.
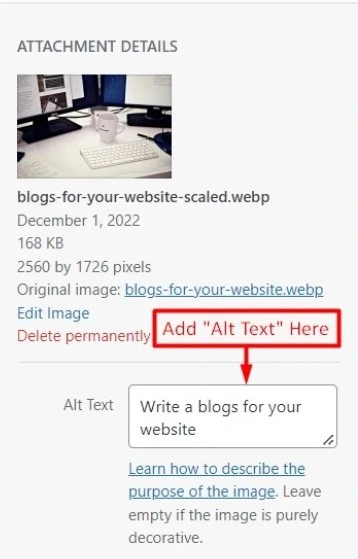
- Select your blog image and add “Alt text” for your blog image.
- Click on the “Set featured image” button.
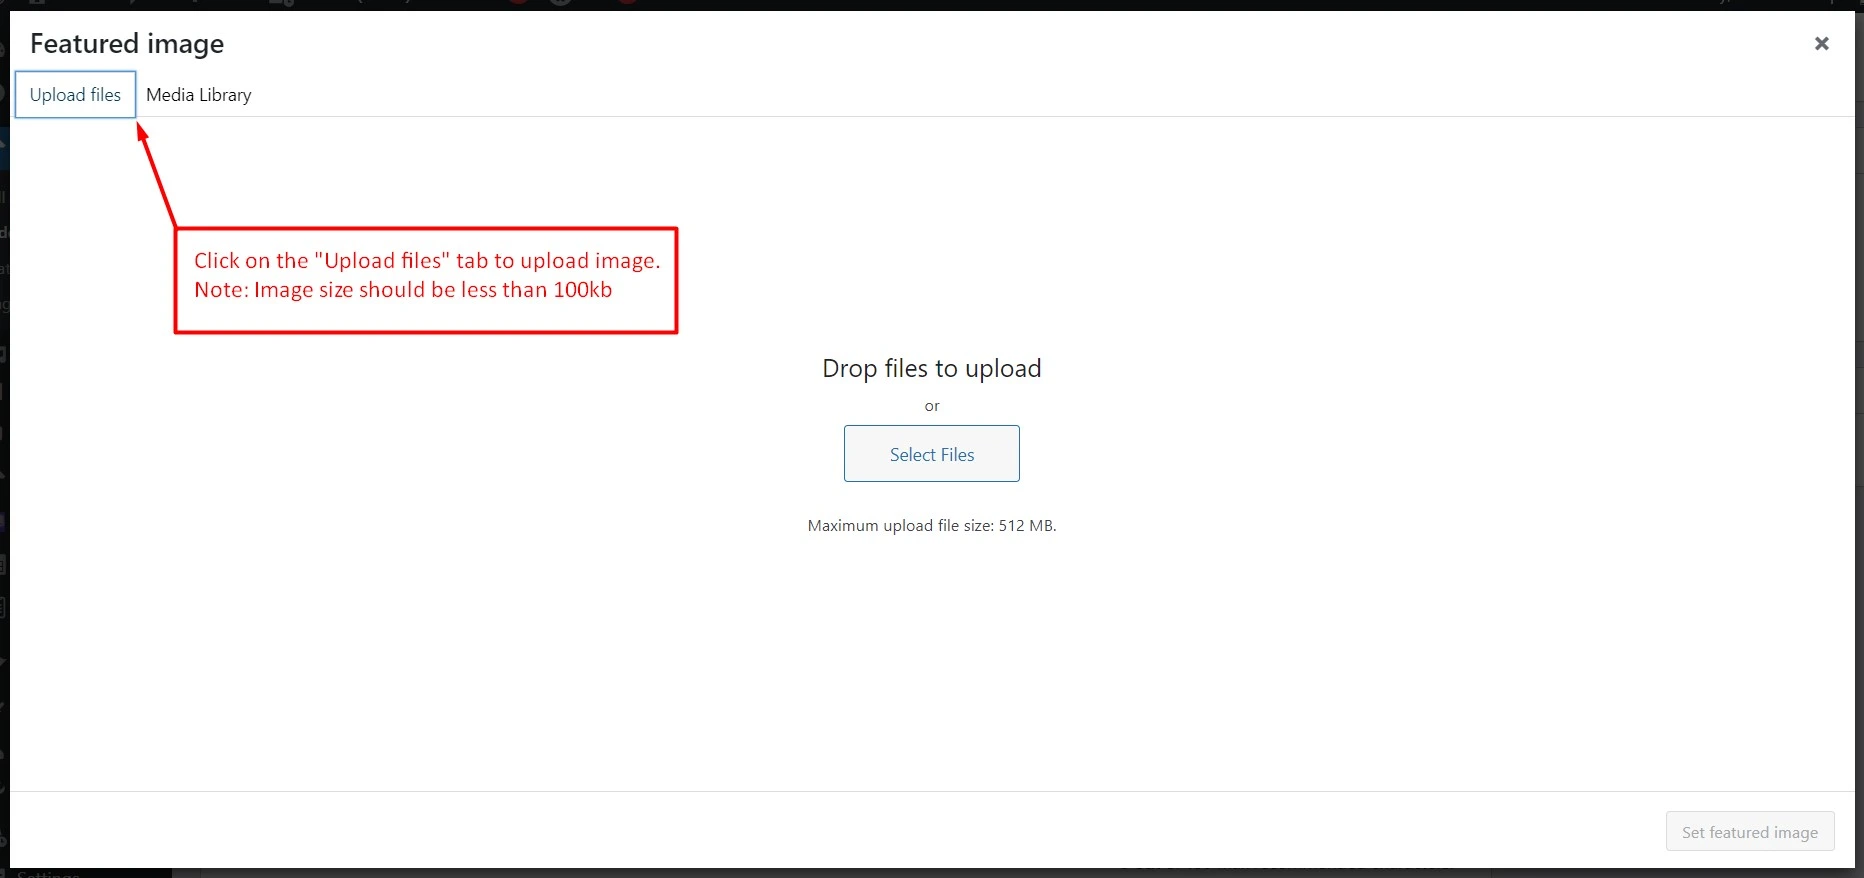
After clicking on the “Set featured image”, the Media Library window will appear. Click on the Upload files tab and select your image from your image-saved location.
(Note: Image size should be less than 100kb and image should be in .webp format)
Tips:
How to reduce image file size?
Reduce the image file size there are multiple websites to optimize the image file size. You can use any of those. For your reference, you can use the following URL to compress the image file size.
Website Name:TinyPng.Webite URL: https://tinypng.com/
How to change the image format from any format to .webp format?
To change the image format there are multiple websites present on the internet. You can use any of them. For your reference, you can use the following URLs to convert the image format.
URLs:
- Cloud Convert Website: https://cloudconvert.com/png-to-webp
- Convertio Website: https://convertio.co/png-webp/
- Free Convert Website: https://www.freeconvert.com/png-to-webp
Upload your compressed WebP image.
Add “Alt Text”
After selecting the image, add “Alt Text” for the image.
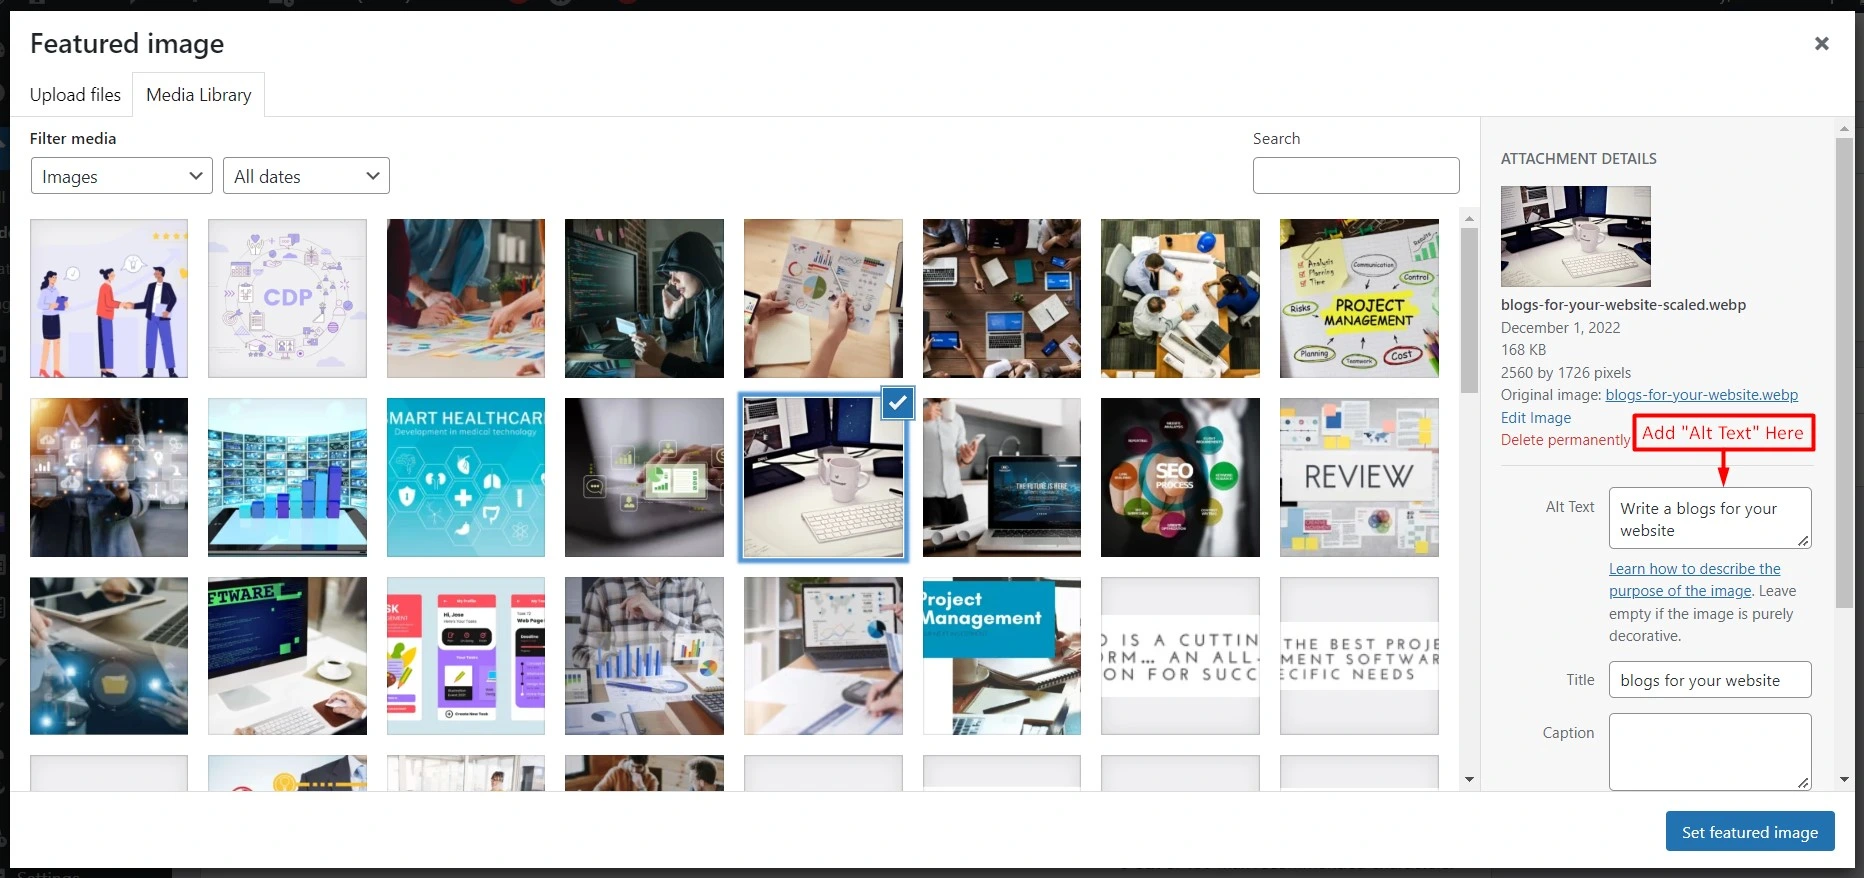
After adding image “Alt Text”, click on the “Set featured image” button. After clicking on the “Set featured image” button, it uploads the image for your blog.
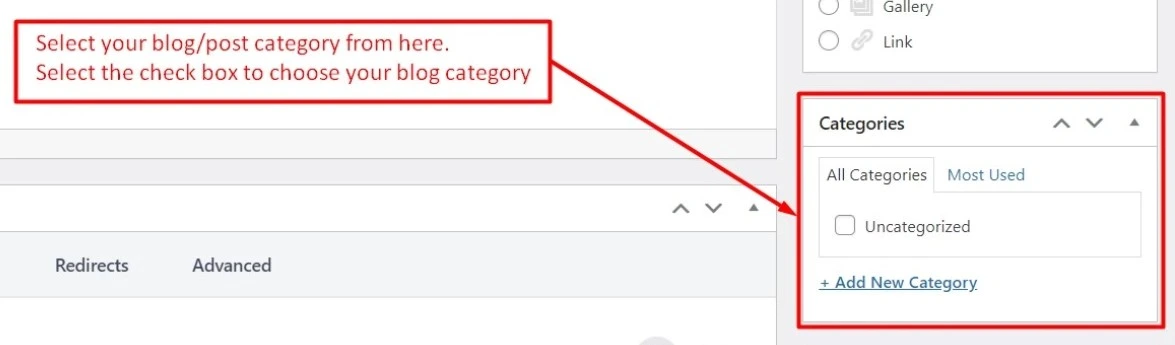
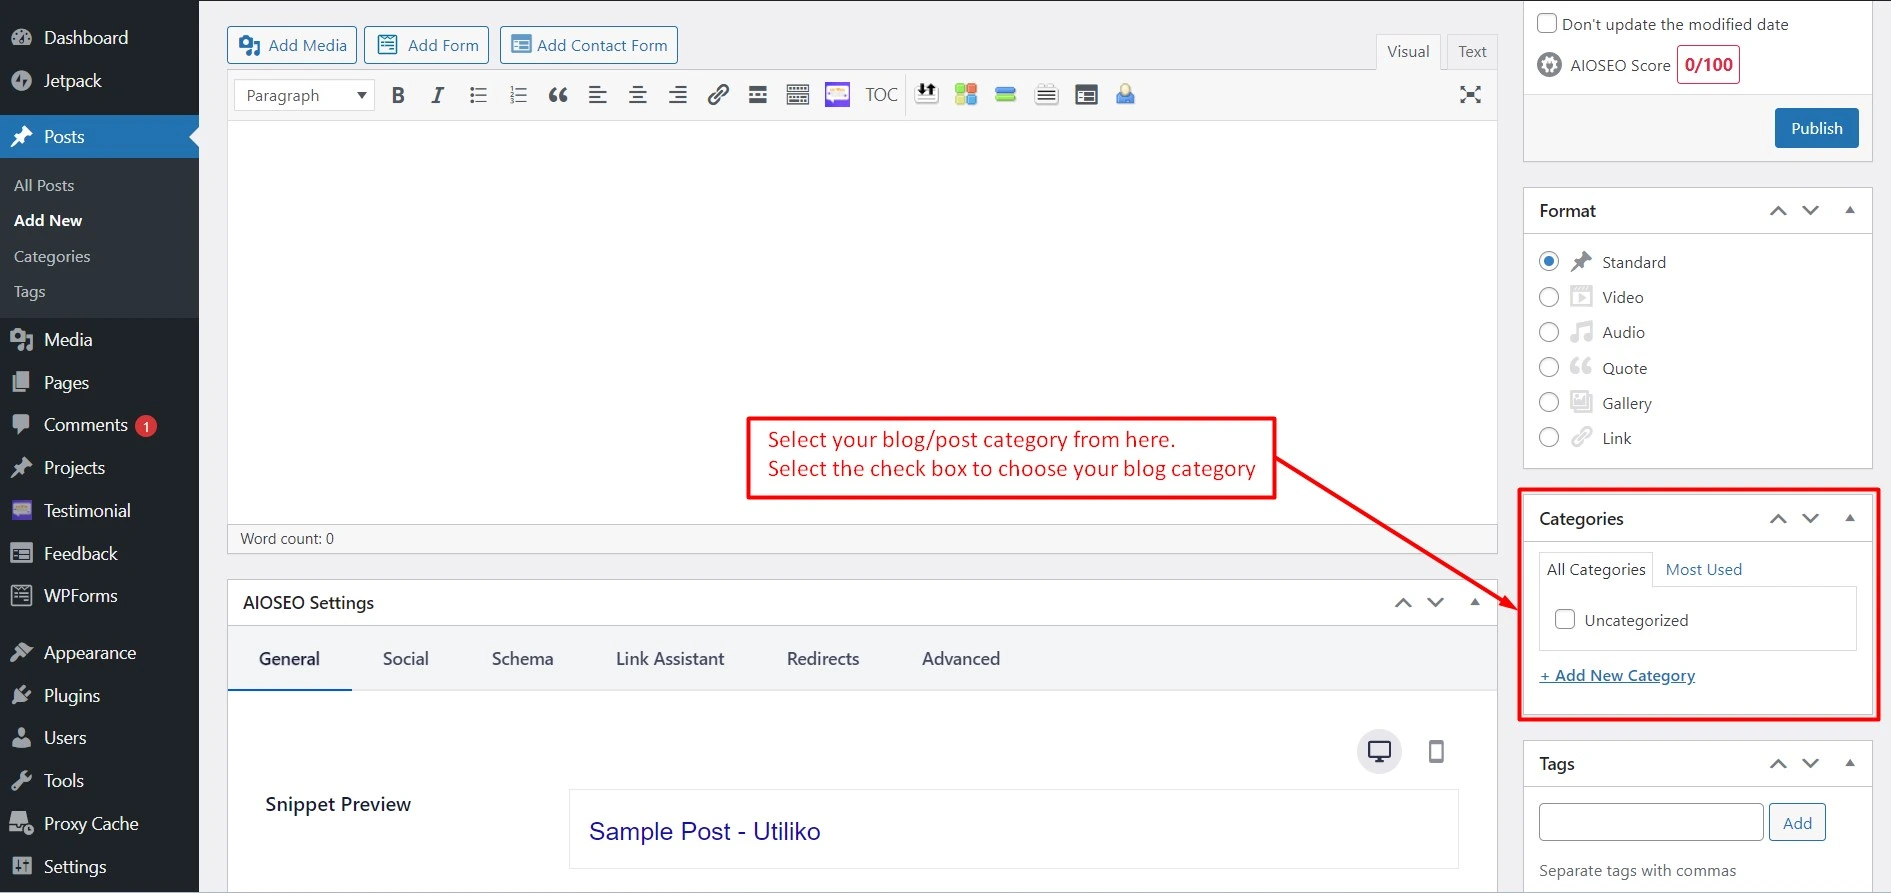
Add Categories
After the image is uploaded to your blog, you have to select a category for your blog. Kindly check the category list in the right sidebar and select the appropriate category for your blog. The following figure shows the position and list of the categories.
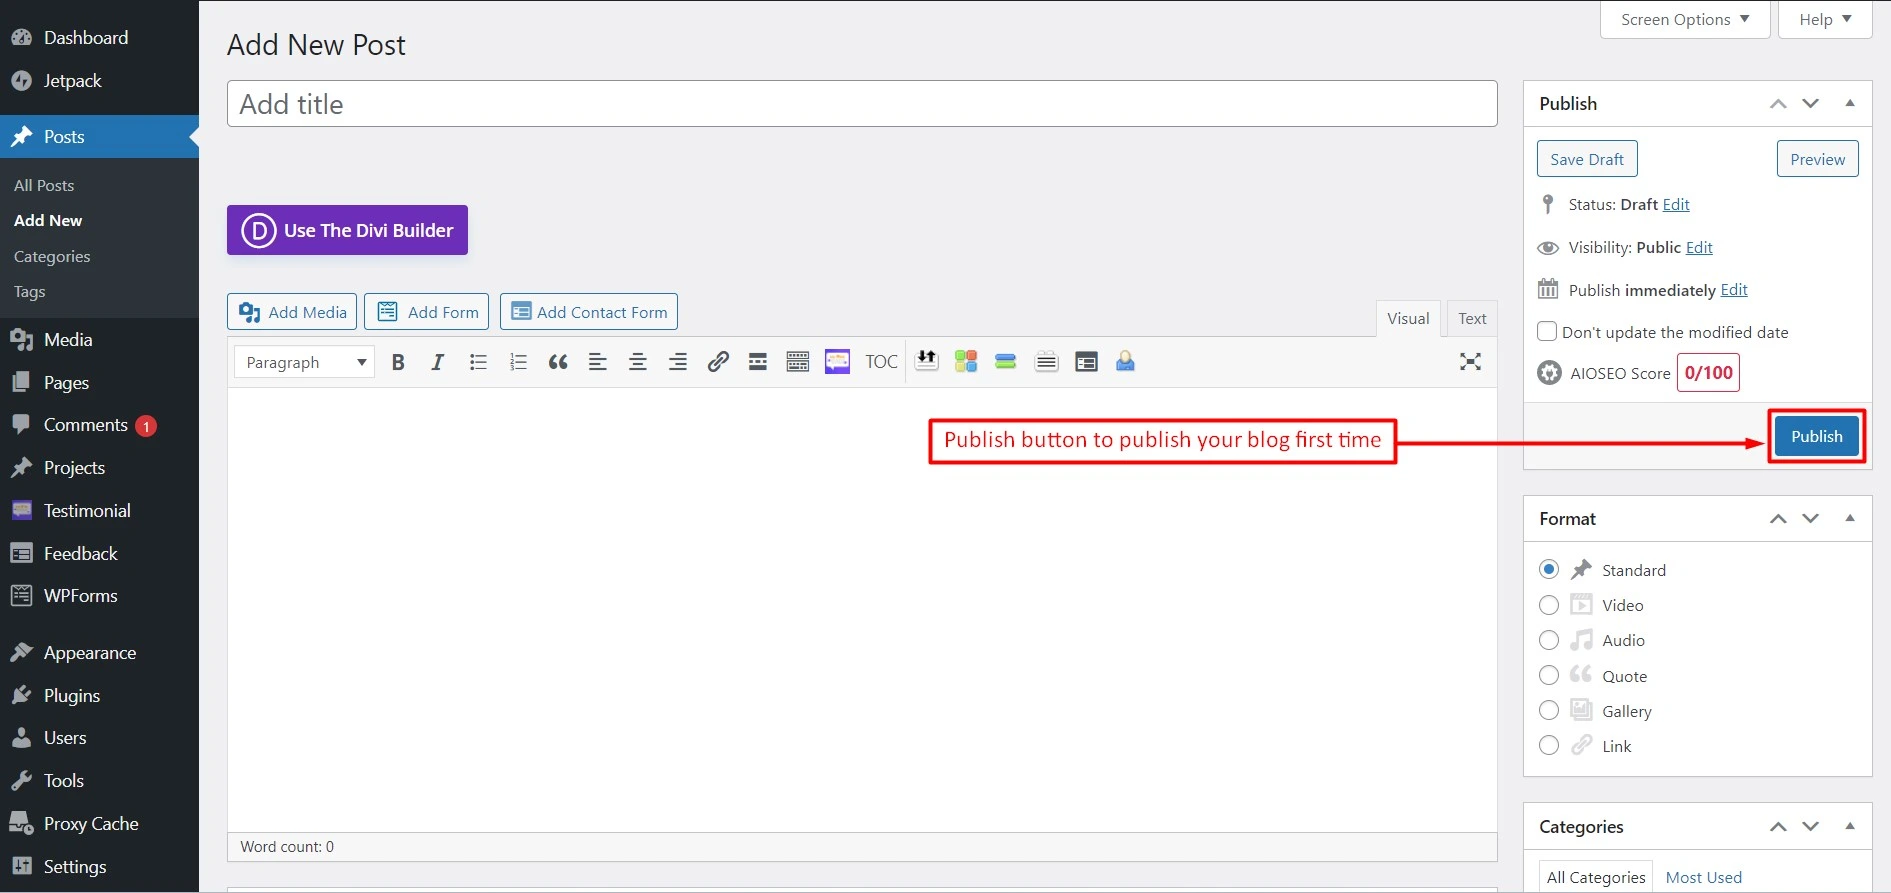
Publish and Update blog
After selecting the category, to publish a blog click on the Publish button present at the upperside right corner. Publish button appears only one time i.e. at the initial stage of blog publishing after that you will get the update button instead of publish button.


Congratulations Your blog has been successfully published on our website.
Update already published blog
Visit Posts Section to update blog/post
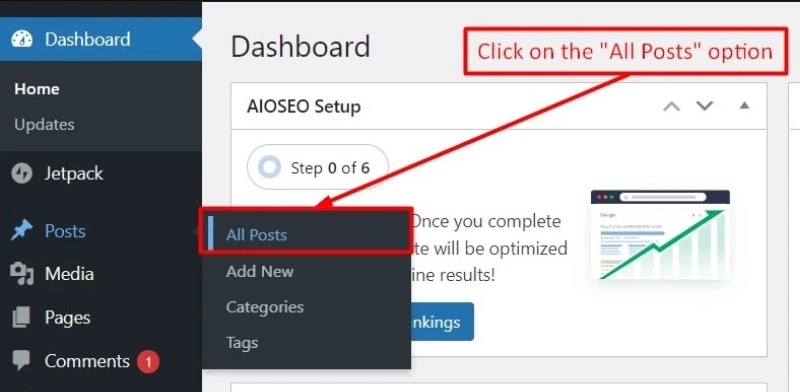
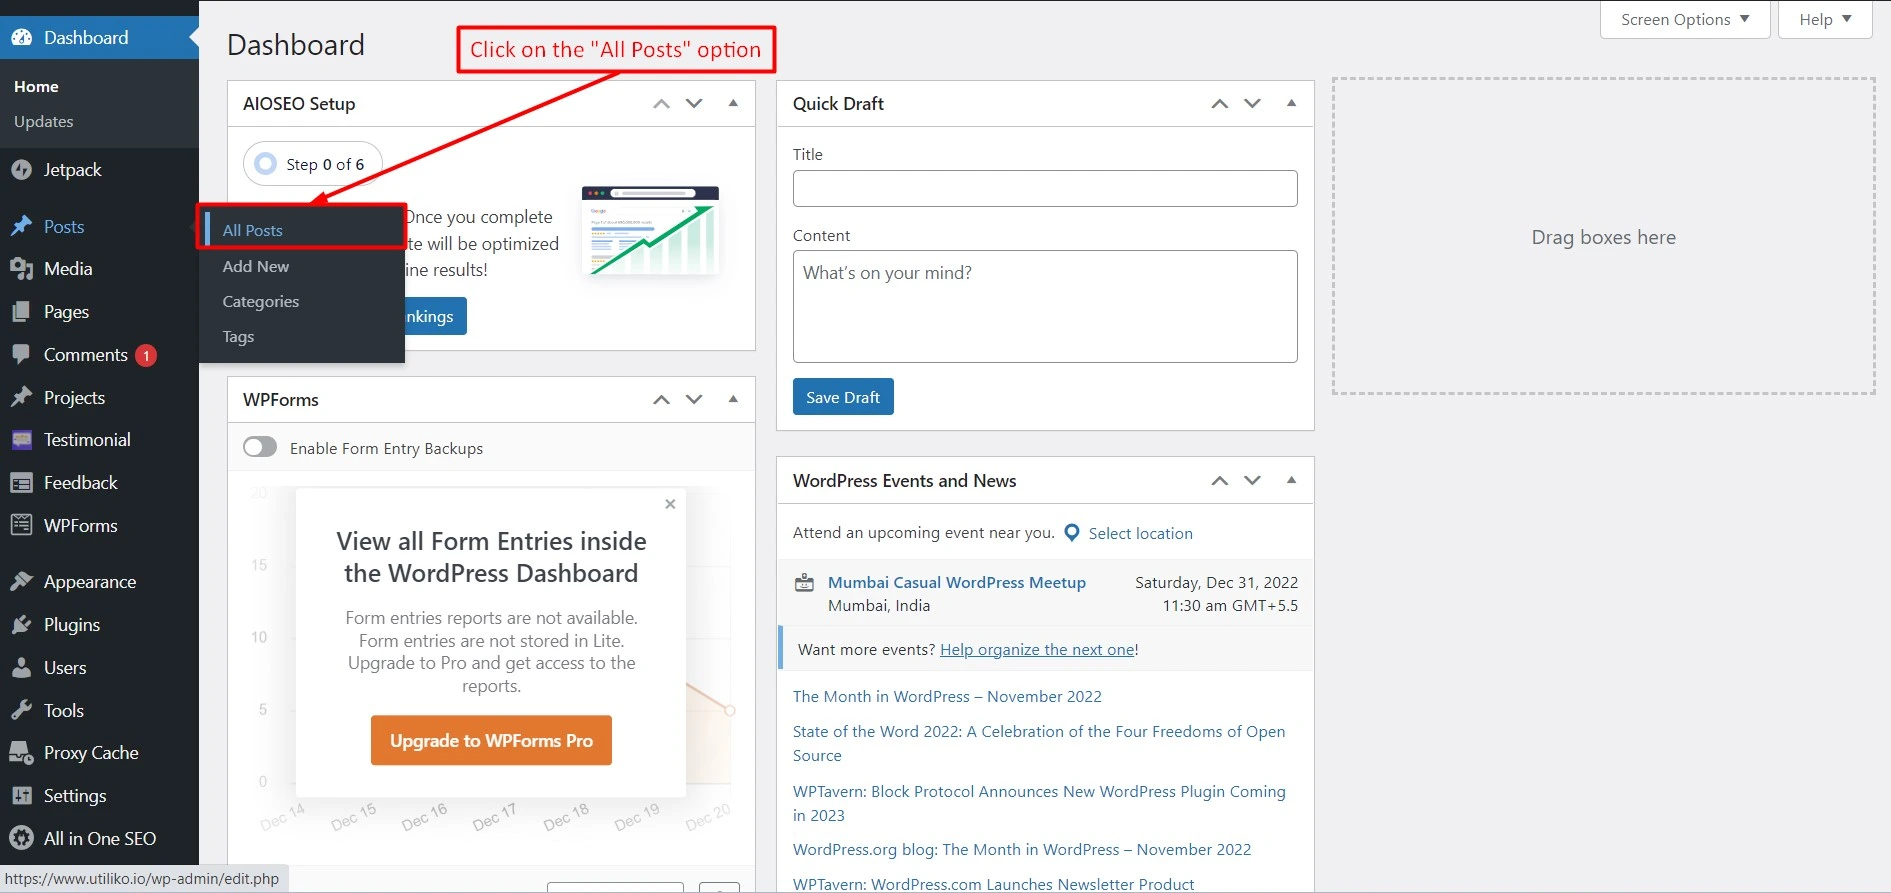
If you want to do changes to your already published blog then move the mouse cursor to the “Posts” option present in the left sidebar of the dashboard. Then click on the “All Posts” option.
All Posts Section
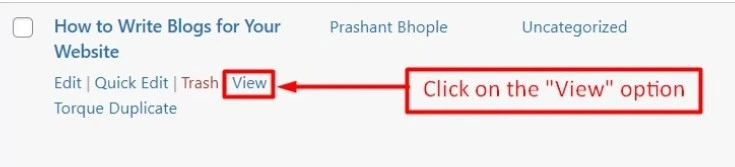
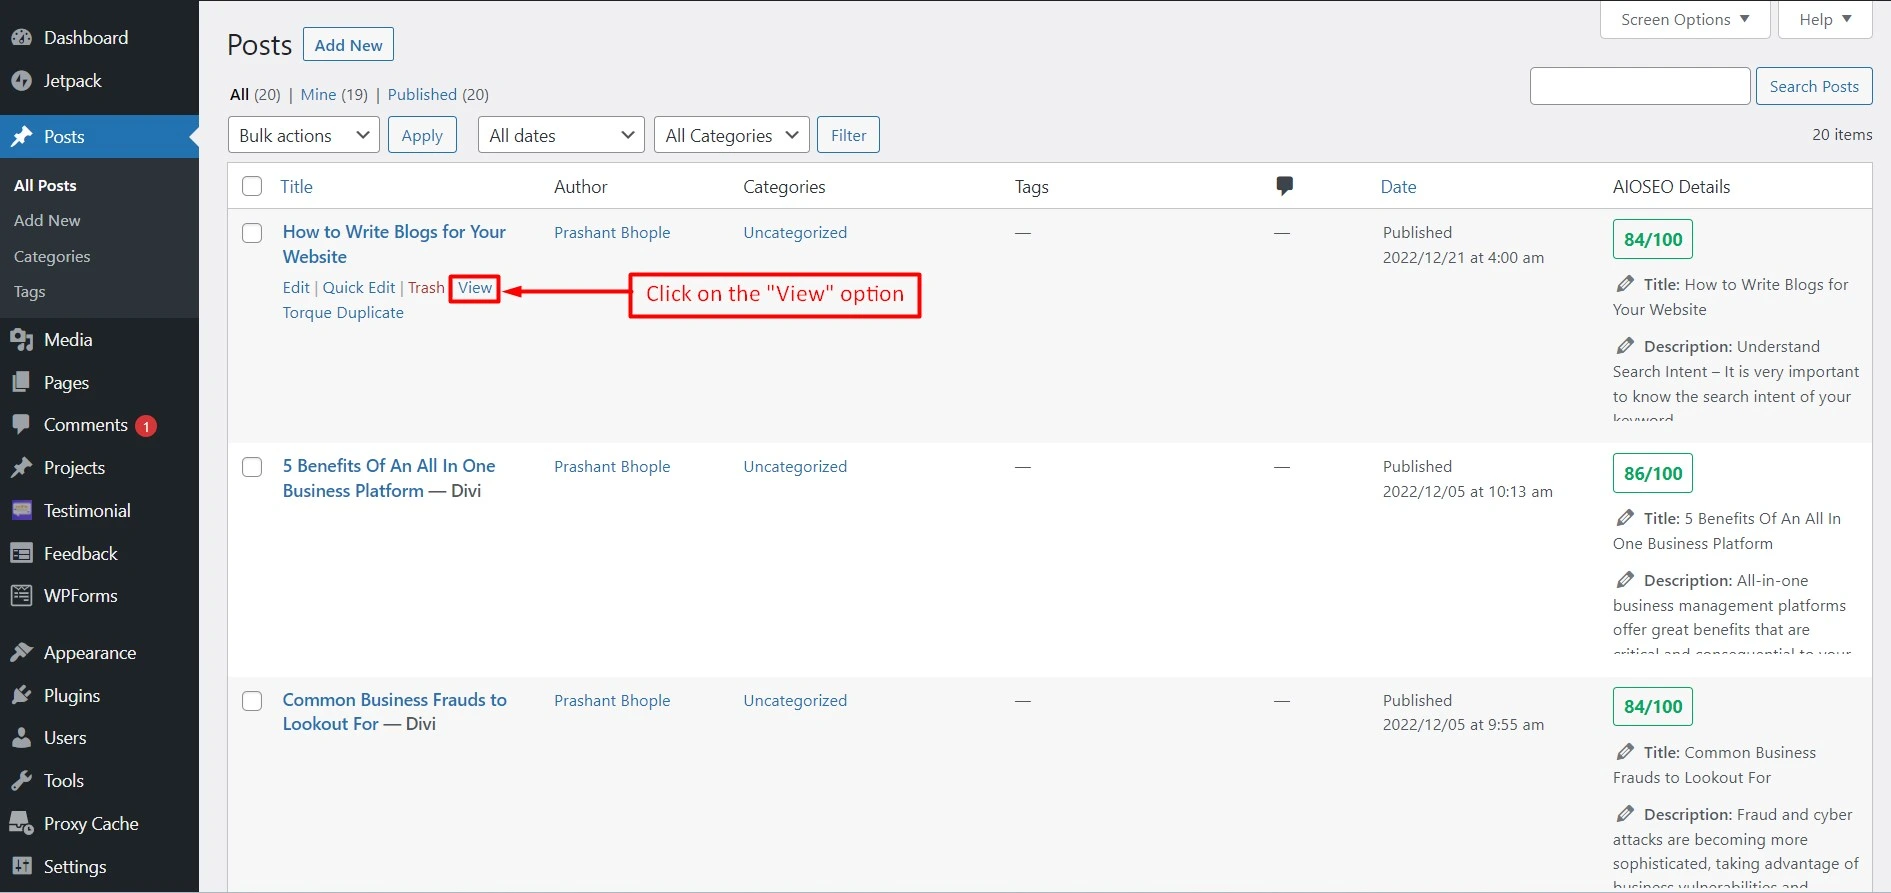
Once you click on the “All Posts” option posts list appears. Move the mouse cursor on your blog/post and click on the “view” option.
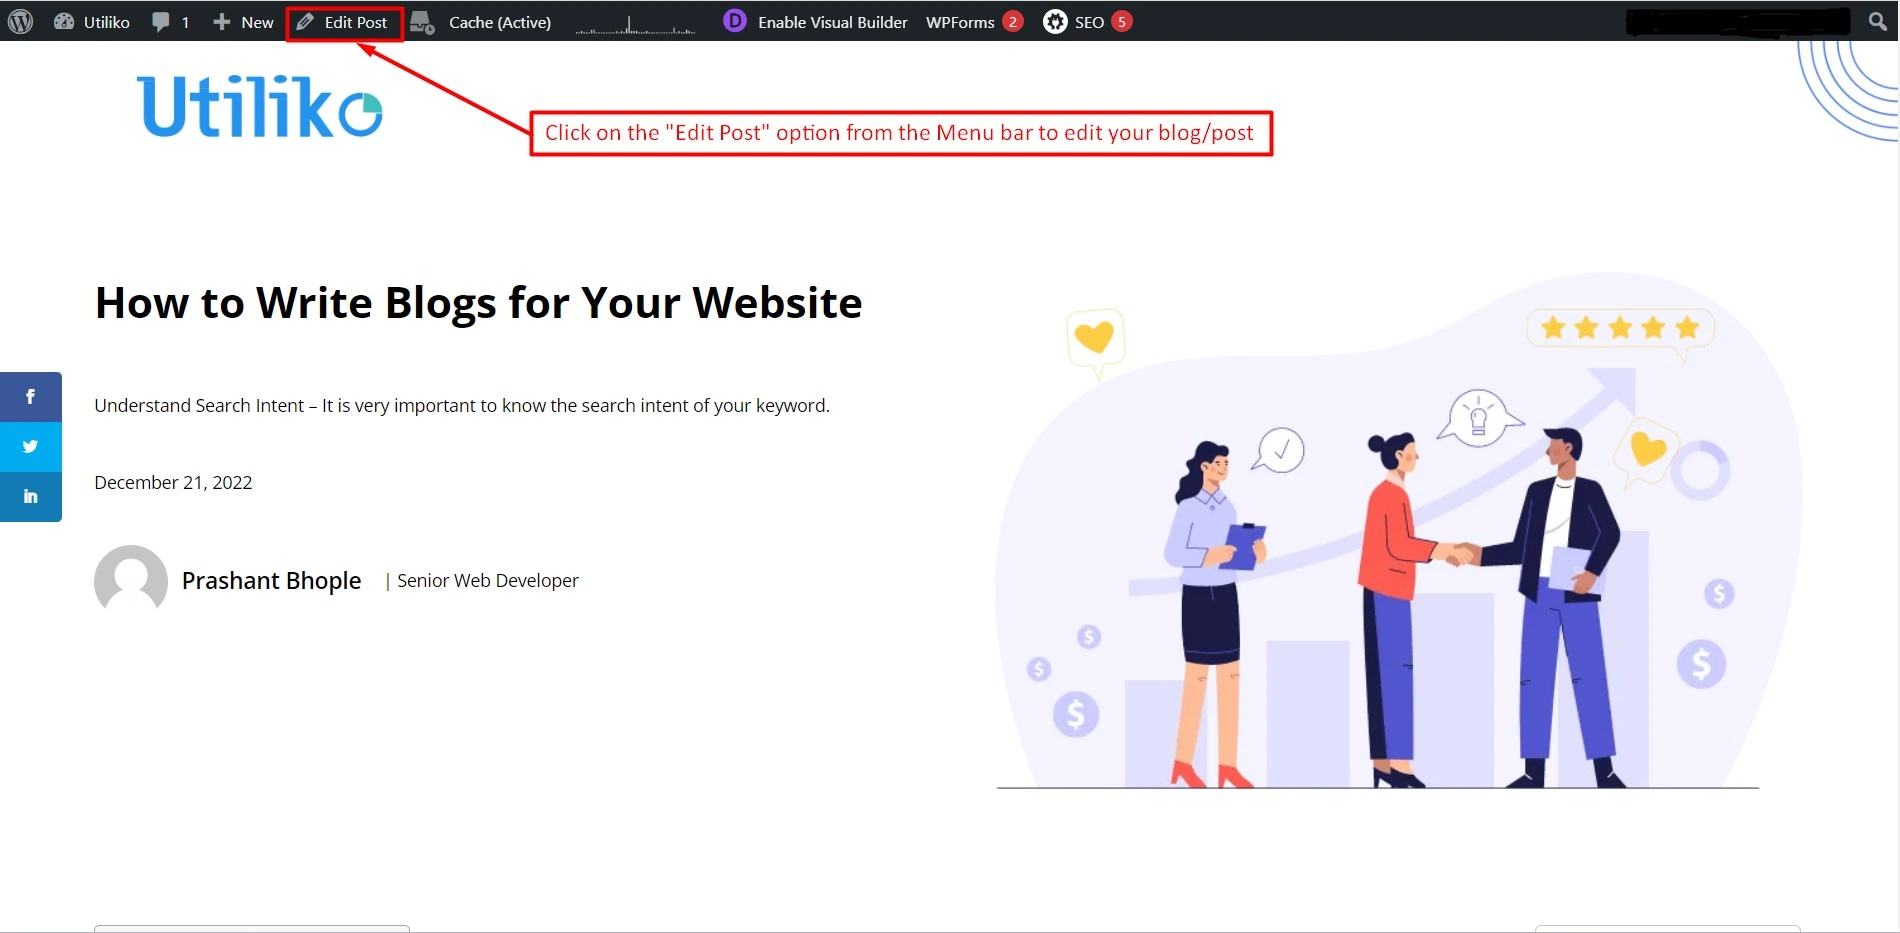
Post Editor Window
When you click on “view” option, your post/blog appears. Click on the “Edit Post” option present on the top menu bar.

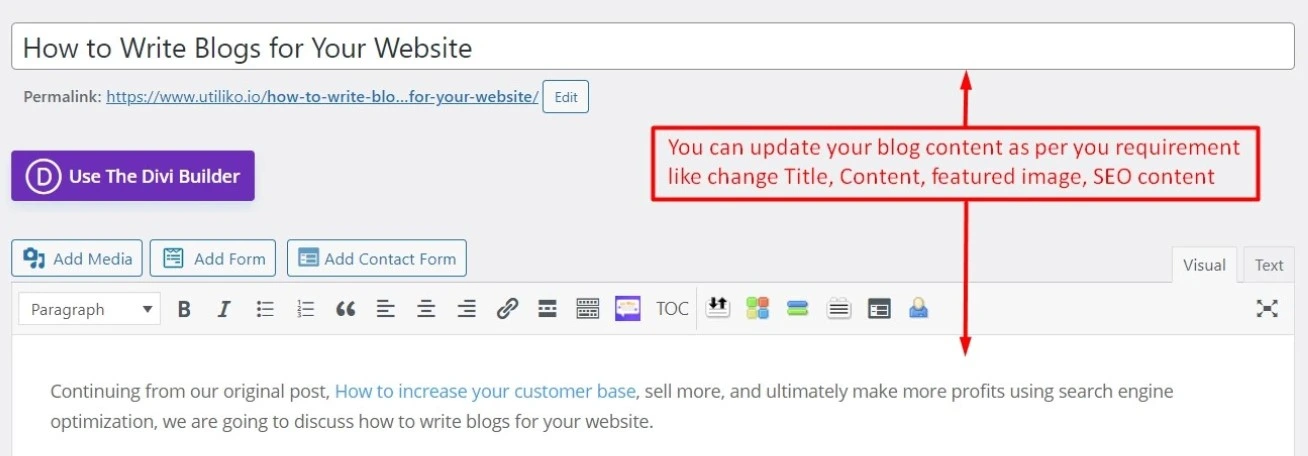
Edit Post View
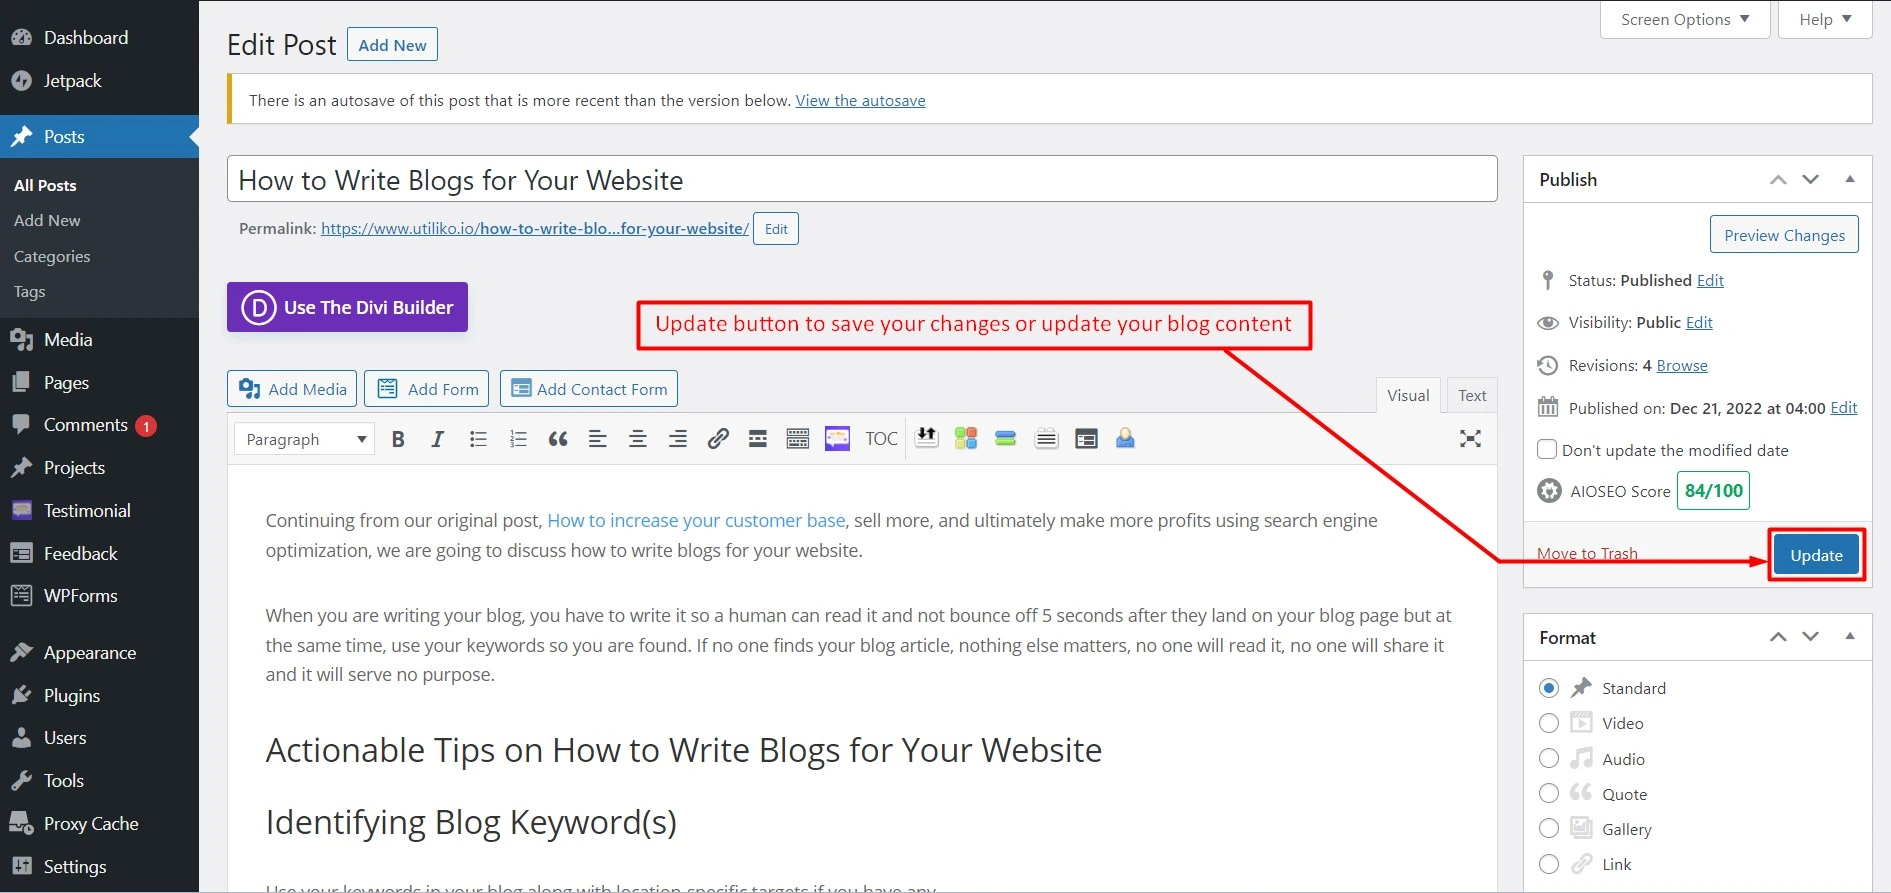
After click on the “Edit Post option, you are able to do chnages in your blog content, category, featured image of your blog.”
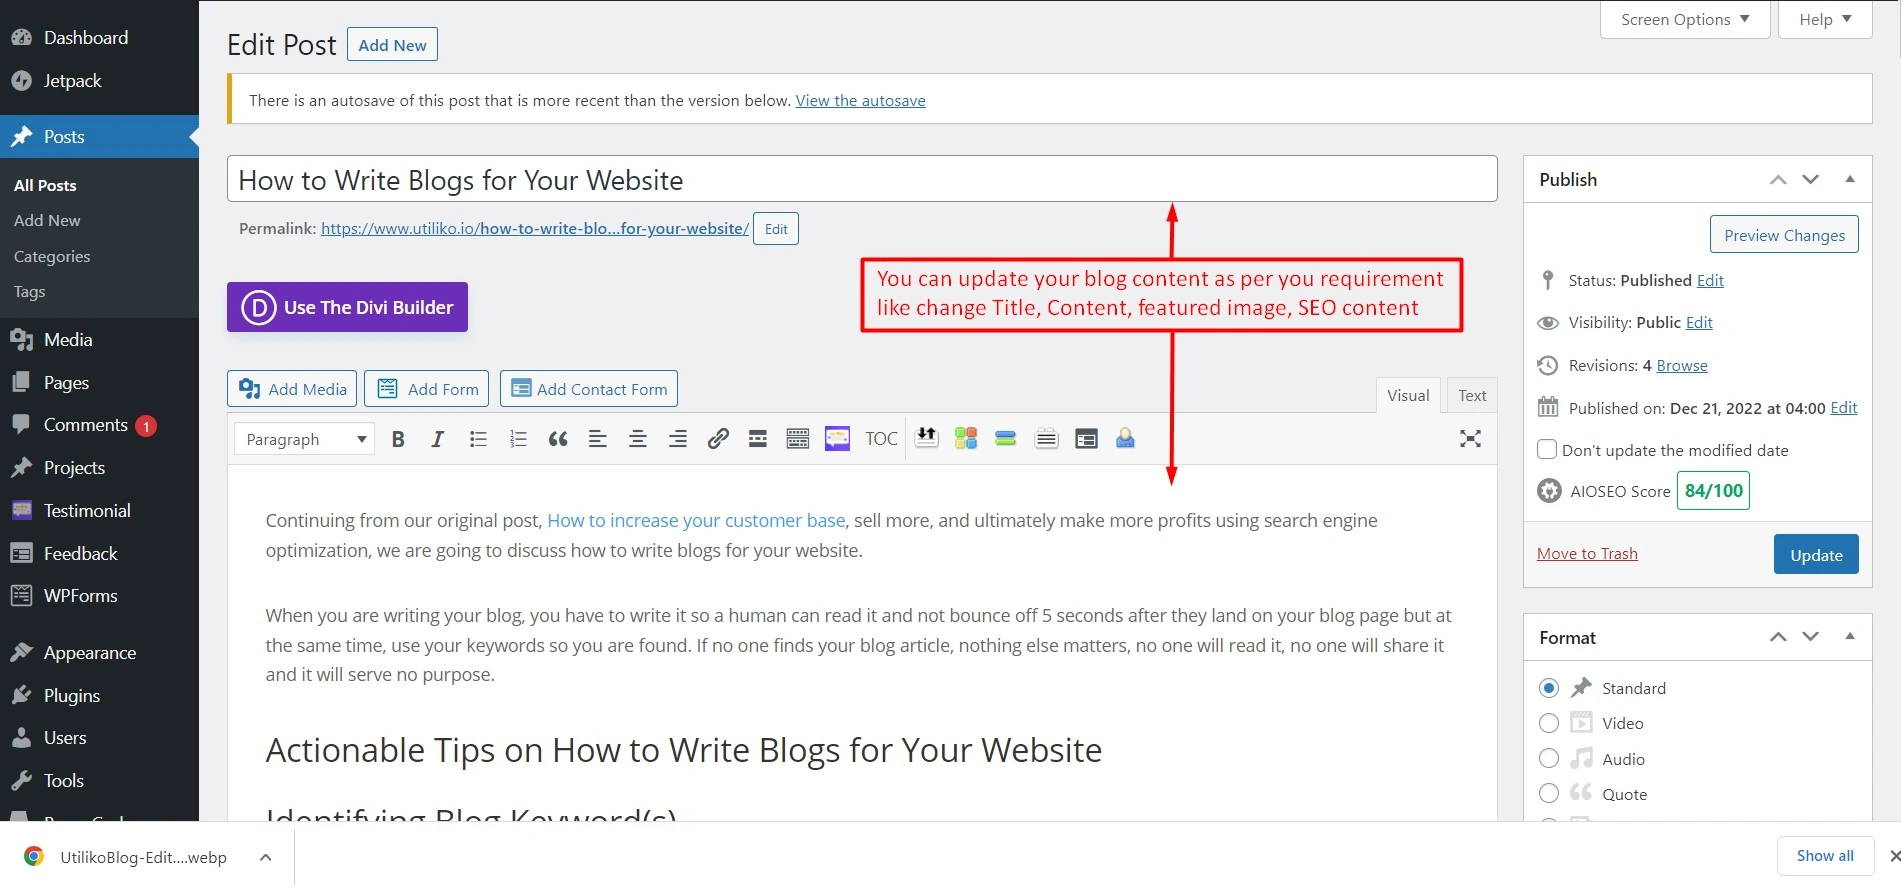
After changing the content, you have to update your blog, and for that, you have to click on the “update” button to save your blog.
Congratulations Your blog has been successfully updated on our website.
Visit us on “How to Write Blogs for Your Website: A Simple Step-by-Step Guide” to learn more about how to publish your blog on the website from an SEO point of view.
Learn more about this topic seo-smm.
Unlock the potential of targeted keywords for your website’s success. Dive into insights now.